![]()
Milesight
Prerequisites
Device Details
Note: UG65/UG67 has built-in ChirpStack MQTT Forwarder, please ensure the firmware version is 60.0.0.43 and later.
Network Connectivity
- Ensure that the gateway and the Chirpstack v4 system are on the same network and can communicate with each other.
Configuring the Gateway
Accessing the Gateway Management Interface
- Log in to the gateway’s management interface using the default credentials
(username:
admin, password:password). - Navigate to
Packet Forward -> General. - Find
Multi-Destinationand click theOperationbutton forEmbedded NS. - In the pop-up window, uncheck the
Enableoption and clickSave.
Setting Up Multi-Destination
- Under the
Multi-Destinationsection, click the+button. - In the pop-up window, check the
Enableoption. - Select
ChirpStack-v4from theTypedropdown menu. - Enter the Chirpstack address in the
Server Addressfield (e.g.,192.168.45.221). - The default
MQTT Portis1883. If you have changed it, enter the modified port number. - Select the appropriate
Region IDbased on your device’s frequency band (e.g.,US915for this test). User CredentialsandTLS Authenticationcan be left empty unless your setup requires them.- Click
Saveto close the window.
Saving and Applying the Configuration
- At the bottom of the
Multi-Destinationpage, clickSave & Apply. - Wait 3-5 minutes and refresh the page.
- Check the
Connect Statusunder theMulti-Destinationsection for theTypeChirpStack-v4. If it showsConnected, the gateway configuration is successful.
Adding the Gateway to Chirpstack
Logging into Chirpstack
- Log in to the Chirpstack management interface using the default credentials
(username:
admin, password:admin).
Adding the Gateway
- Navigate to
Tenants -> Gateways. - Click
Add gateway. - Fill in the necessary information in the pop-up window:
Name: EnterUG65-US915.Gateway ID (EUI64): Enter24E124FFFEF5408E.- Fill in other parameters as required.
- Click
Submit.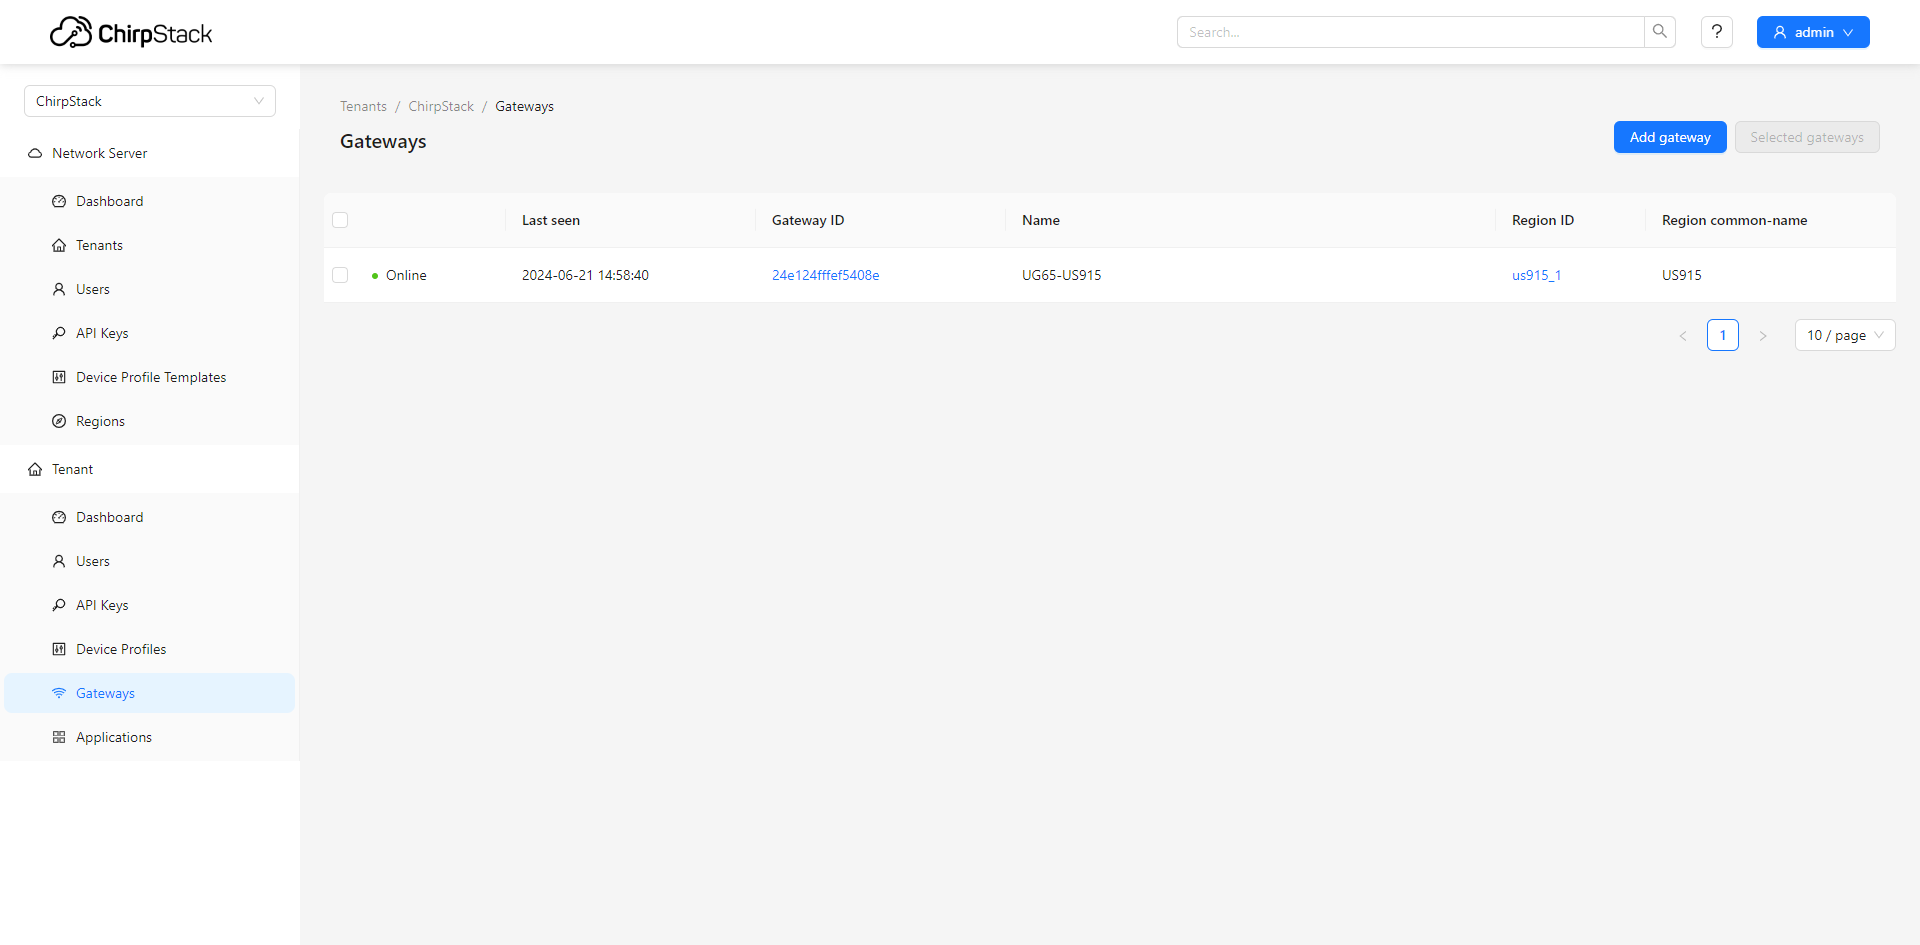
Verifying the Gateway Connection
- Navigate back to
Tenants -> Gateways. - Check the status of the newly added gateway. If it shows
Online, the gateway has been successfully added and is operational. - Click on the blue ID code under the
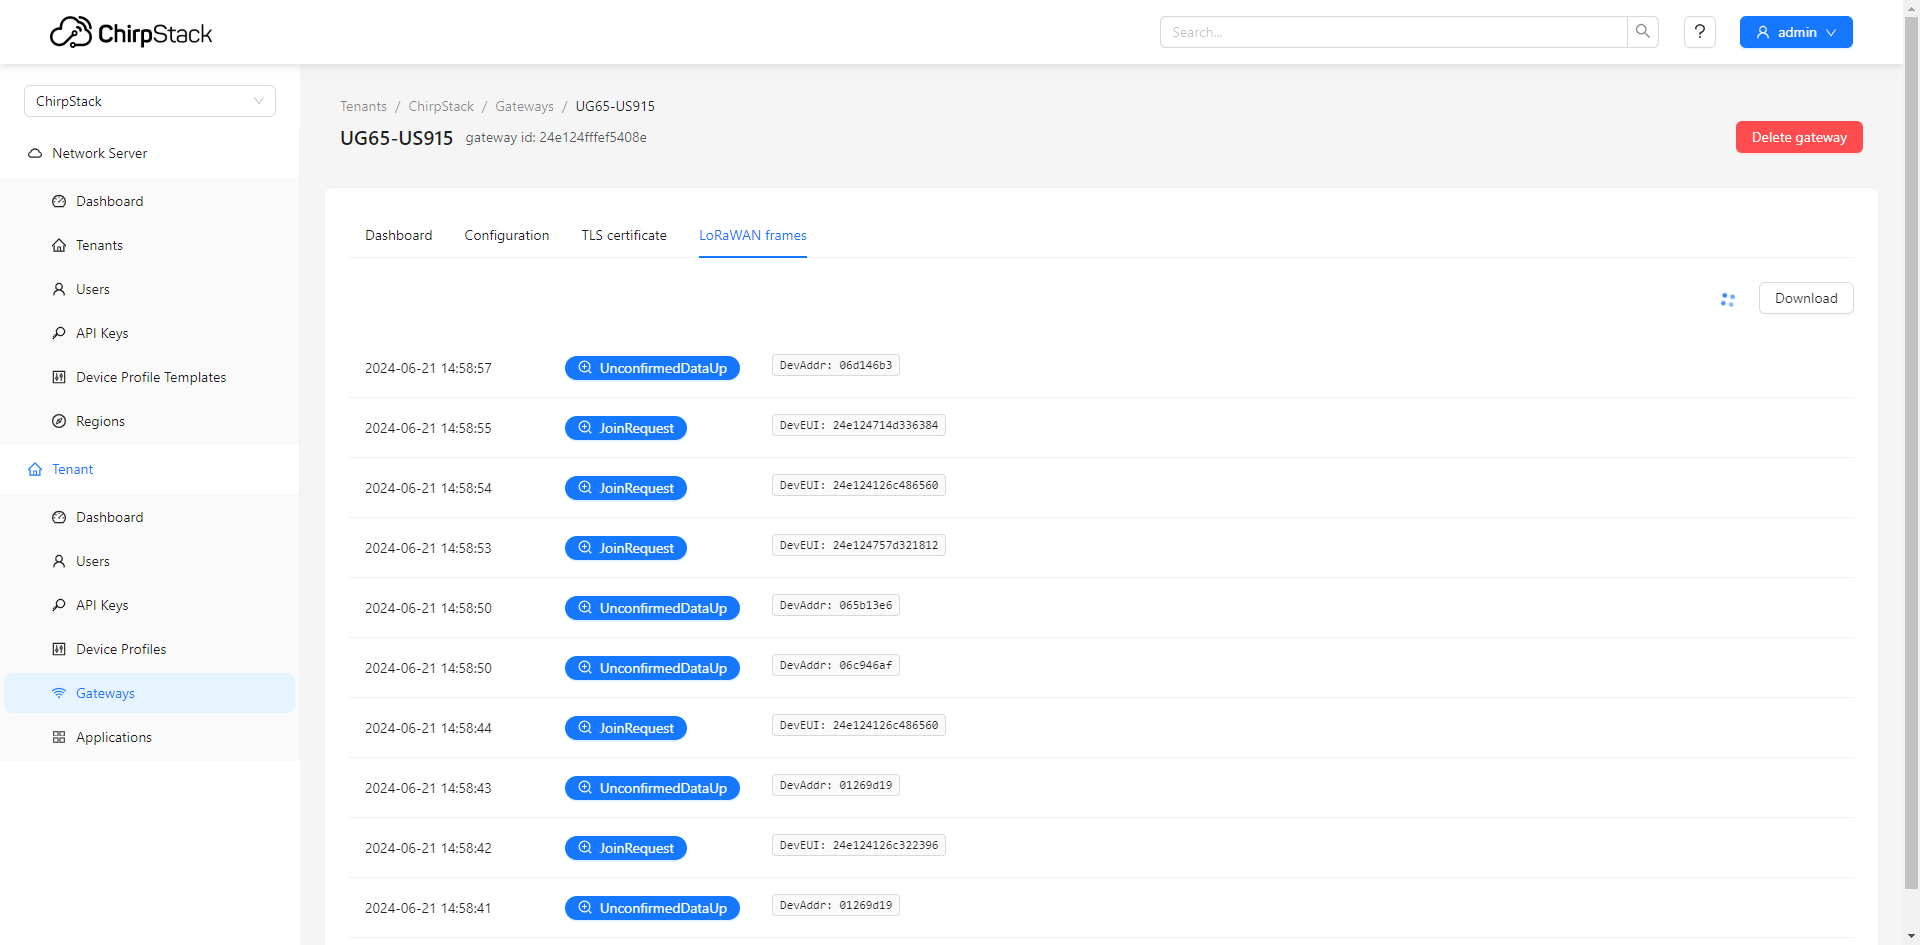
Gateway IDcolumn. - In the new interface, go to the
LoRaWAN framestab. - Ensure there is data scrolling, indicating a successful data link between the
gateway and Chirpstack.
Finally
The gateway has been successfully connected to the Chirpstack v4 platform.